
Picture this: It’s a beautiful summer day, and you’re ready to give your lawn a much-needed trim. You bring out your trusty Craftsman lawn mower, but as you start it up, you notice something’s not quite right. The engine is sputtering, and it doesn’t seem to be running smoothly. Chances are, your carburetor could be the culprit. A dirty or clogged carburetor can cause issues with fuel delivery, leading to poor performance or even engine failure. But fear not! In this article, we’ll guide you through the process of cleaning the carburetor on your Craftsman lawn mower, so you can get back to maintaining your lawn with ease.
Why Clean the Carburetor?
Before we dive into the cleaning process, let’s first understand why cleaning the carburetor is essential. Over time, debris, dirt, and stale fuel can accumulate in the carburetor, obstructing the flow of fuel to the engine. This buildup can cause uneven idling, rough acceleration, reduced power, or even prevent the engine from starting altogether. By regularly cleaning the carburetor, you can prevent these issues and ensure your Craftsman lawn mower operates at its optimal performance.
Tools and Materials You’ll Need
To clean the carburetor on your Craftsman lawn mower, gather the following tools and materials:
- Safety goggles and gloves
- Screwdrivers (flathead and Phillips)
- Carburetor cleaner (specifically formulated for small engines)
- Compressed air can or an air compressor
- Clean cloth or paper towels
- Small container for soaking small parts
- Replacement gaskets (if necessary)
- Your Craftsman lawn mower’s manual
Step 1: Preparation
Start by ensuring your Craftsman lawn mower is turned off and the engine is cool. This step is important for your safety and to prevent any accidental damage. It’s also a good idea to refer to your mower’s manual, as it may provide specific instructions or diagrams for your particular model.
Step 2: Accessing the Carburetor
To access the carburetor, you’ll need to remove the air filter cover and air filter. These are usually located on the side or top of the engine. Use your screwdriver to carefully unscrew any screws or bolts securing the cover in place. Once removed, set them aside in a safe place.
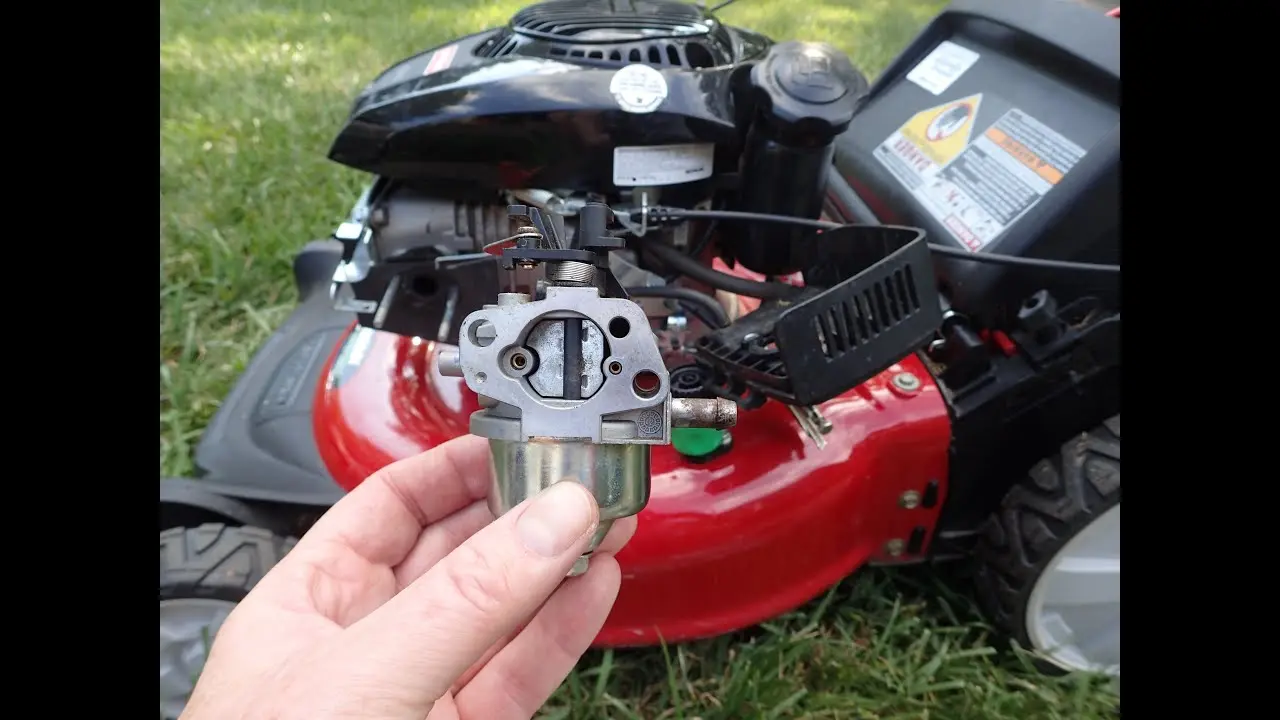
Step 3: Removing the Carburetor
Locate the carburetor, which is typically situated beneath the air filter housing. Depending on your model, you may need to disconnect the fuel line and any electrical connections before removing the carburetor. Take note of the connections and their positions to ensure you can reassemble them correctly later.
Using your screwdriver, carefully loosen the screws or bolts holding the carburetor in place. Gently lift the carburetor, being cautious not to damage any surrounding components, and set it on a clean work surface.
Step 4: Disassembling the Carburetor
With the carburetor removed, it’s time to disassemble it for a thorough cleaning. First, carefully remove the float bowl by unscrewing the retaining bolt or nut. Be cautious as the bowl may contain residual fuel. Set the bowl aside.
Next, detach the float, needle, and seat. These components may vary depending on your carburetor design. Pay close attention to their positions and take photos if necessary to help you remember the correct assembly later.
Callout: Take your time during the disassembly process, making sure to keep track of each component. A well-organized workspace and clear photos can be invaluable when it comes time to reassemble the carburetor.
Step 5: Cleaning the Carburetor
Now that you have disassembled the carburetor, it’s time to clean each component individually. Use carburetor cleaner and a soft-bristle brush to remove any dirt, debris, or varnish. Pay particular attention to the small passages and jets as these can easily become clogged. For stubborn buildup, you can soak the components in carburetor cleaner for a few minutes, ensuring not to submerge any rubber or plastic parts.
Once each component is clean, use compressed air or an air compressor to blow out any remaining residue or cleaner. This step helps to ensure that all the tiny passages and jets are completely clear.
Callout: When using compressed air, always wear safety goggles to protect your eyes from any debris that may be blown out.
Step 6: Reassembling and Installing the Carburetor
After cleaning and drying each component, carefully reassemble the carburetor in the reverse order of disassembly. Make sure to position the float, needle, and seat correctly, referring to any photos or diagrams you took during the disassembly process.
Once the carburetor is fully assembled, carefully reinstall it on your Craftsman lawn mower. Ensure that all connections, such as the fuel line and electrical connections (if any), are securely reattached. Use your screwdriver to tighten the screws or bolts holding the carburetor in place.
Step 7: Finishing Touches
With the carburetor back in place, it’s time to reinstall the air filter and air filter cover. Ensure that the air filter is clean and free from debris before reattaching it. Use your screwdriver to secure the cover, making sure it is tightly fastened.
Step 8: Testing and Maintenance
Now that you’ve cleaned the carburetor and reassembled your Craftsman lawn mower, it’s time to test it. Start the engine and listen for any irregularities. If the engine starts smoothly and runs without any issues, congratulations! You’ve successfully cleaned the carburetor.
To maintain optimal performance, it’s recommended to clean the carburetor at least once a year or whenever you notice any symptoms of poor performance. Regular maintenance, including air filter cleaning and oil changes, can also help prolong the life of your Craftsman lawn mower.
Conclusion
Cleaning the carburetor on your Craftsman lawn mower is an essential maintenance task that can help ensure your mower runs smoothly and efficiently. By following the step-by-step guide outlined in this article, you can tackle this task with confidence. Remember to refer to your mower’s manual for specific instructions and diagrams, and always prioritize safety by wearing goggles and gloves. With a clean carburetor, you’ll be on your way to maintaining a pristine lawn all season long.
Callout: Keep your Craftsman lawn mower running smoothly with regular carburetor cleaning. Your lawn will thank you!